Links & Spring Cleaning
Just a quick note to let you know that I’m doing some major work on the blog right now, so I apologize if anything is screwy or inaccessible. I’m hoping to get everything fixed (and better than ever!) in the next couple of days. In the meantime, how about some links?
Love this shirt DIY.
Adding this sweet dress to my wishlist.
Someday I want to store my shoes and clothes in pretty display cases like this. A girl can dream, right?
Want to make some adorable polka-dotted tights? Check out this tutorial.
These painted plastic toys got an awesome makeover!
This string art is a great way to show your love for your state.
Pillars of Creation Pillows
It’s been a while since I’ve posted about my Etsy shop, Pillars of Creation, but I’m happy to announce that in addition to galaxy-print silk scarves, I’m also now selling nebula-print throw pillow covers. I currently have these three listed:
I’ll be making them in three more designs, too, which correspond to this, this, and this scarf.
You might notice that right now I have no pictures of the pillows on furniture, and this is something that I want to remedy as soon as possible! Unfortunately, right now my couch is in storage, and these pillows just wouldn’t look right on my parents’ overstuffed leather furniture. So if you are in the Portland area and have a stylish living room where I could take photos of my pillows, email me at transientexpression@gmail.com. I’ll give you a free pillow cover in exchange for furniture modeling!
Tutorial Tuesday: Fringe Necklace
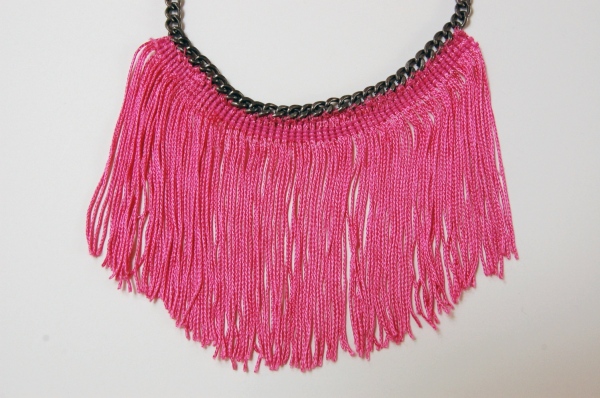
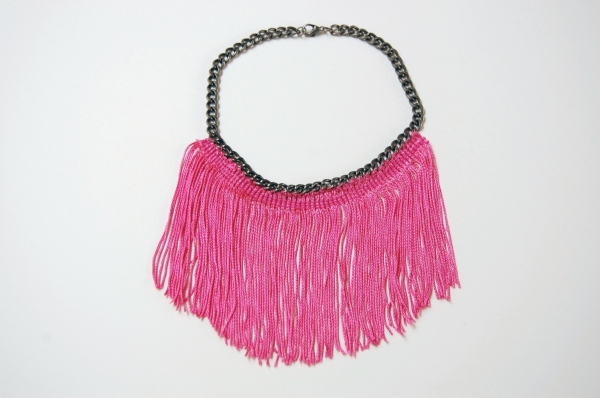
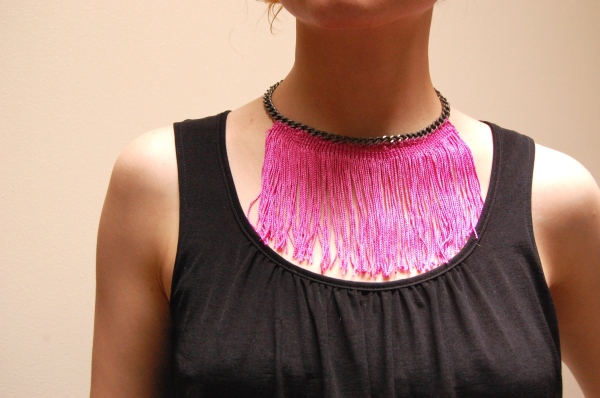
Since I saw photos of Missoni’s Spring 2012 collection a few months ago, I have been meaning to make a fringe necklace. I finally made one today, and I’m happy to report that it’s quite easy and customizable. For mine I used shorter fringe in a different color than the designer version, and I’m not a fan of gold chain so instead I used silver. But you can easily alter these details to make your own version of this necklace. Read on for the instructions!

Left, Vogue.com, Right, Net-a-porter.com
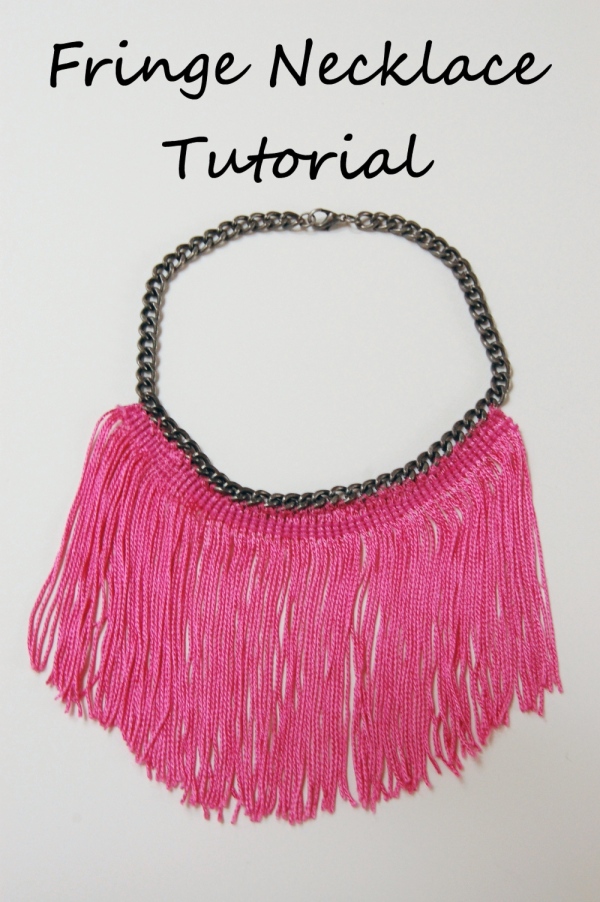
Materials:
16-inch necklace chain with large links
4-inch-long fringe trim, 7 inches wide
Thread that matches the fringe
Needle
Scissors
Measuring tape or ruler
Methods:
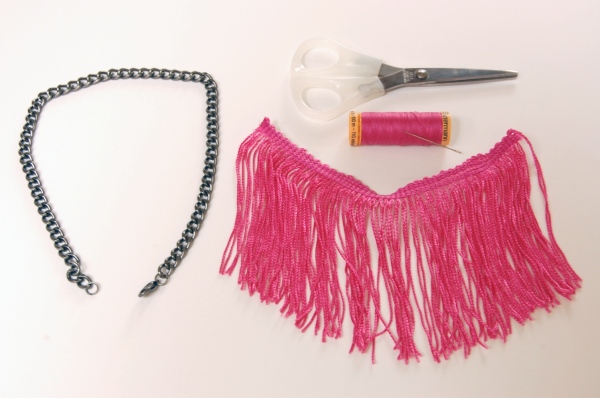
1. Cut a piece of fringe to 7 inches long. You can very carefully melt the ends with a flame to keep them from unraveling, but be careful not to set it on fire.

2. Measure your chain to find the center, and center the fringe on the chain.
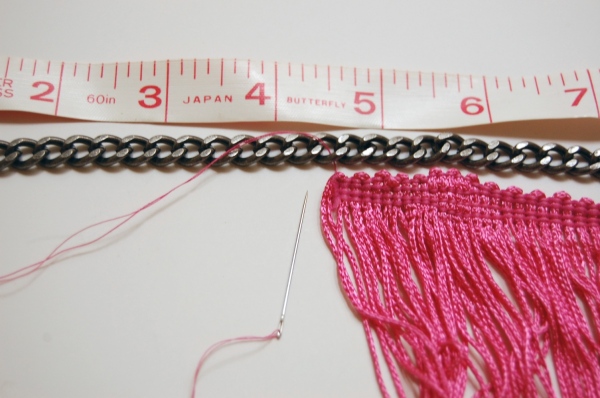
3. Thread a needle, knot the end of the thread, and beginning from the left, start sewing the top of the fringe to the bottom of the chain.
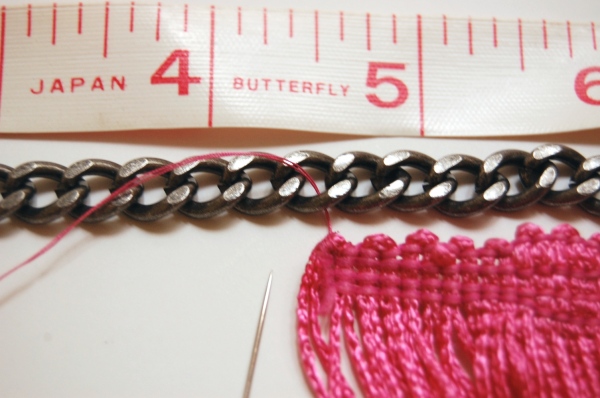
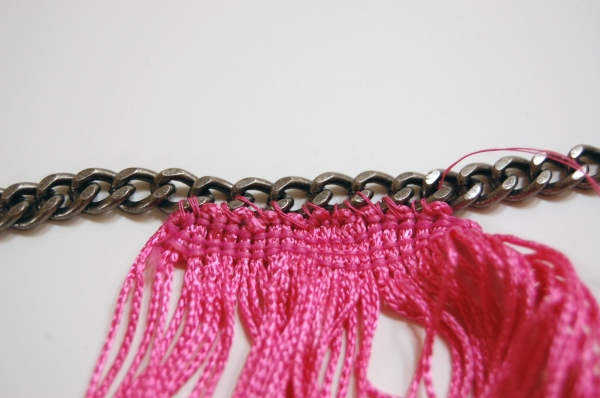
5. Continue sewing, being careful not to twist the chain or the fringe.
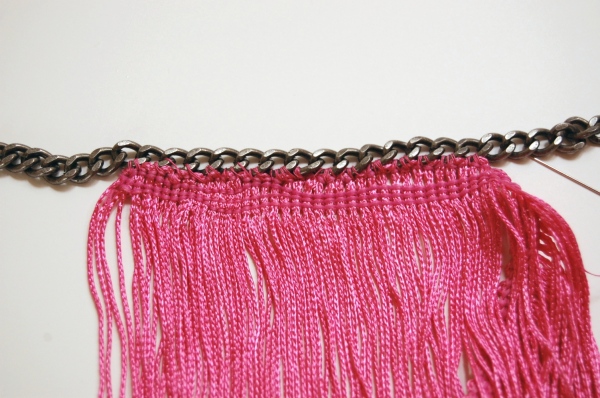
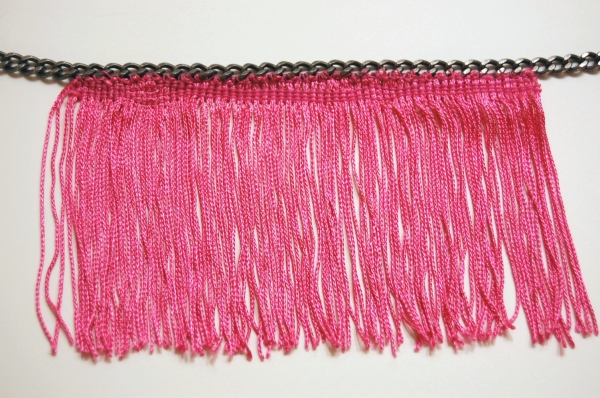
6. Continue until you’ve sewn all 7 inches of the fringe to the chain, then tie off the thread.

Sunday Street Style
As I went through my favorite street style blogs this week, a theme began to emerge from the images I was drawn to. I decided that a hat was required to make the cut. I’m not even sure what kinds of hats some of these are, but they cover the head and complete the outfit, and that’s enough for me.

Top row: The Locals, The Sartorialist
Middle row: Fashionistable, Stockholm Streetstyle
Bottom row: The Sartorialist, Vanessa Jackman
3 Inspiring DIY Ideas
Tonight I thought I’d share some DIY ideas I’ve been pinning this week.
1. Bleach-dipping: Dip a dress, denim jacket, or shirt in bleach and splatter it around a bit.
 Left, right
2. More studs: I know I’ve tackled studs before, but I especially love them on these bright Converse.
 Left, right, Burberry studded trench
3. Head wraps: Nothing says spring like florals, and a cute flower-print wrap or flower headband might be just the thing to get you in the mood for warmer weather.
 Center, left, right
Earlier this evening I heard a report on NPR that warmer and drier weather than usual is expected this spring…”except in the Northwest.” I guess I won’t be wearing my spring DIY projects anytime soon, but I hope the rest of you will!
Tutorial Tuesday: Pom-Pom Earrings
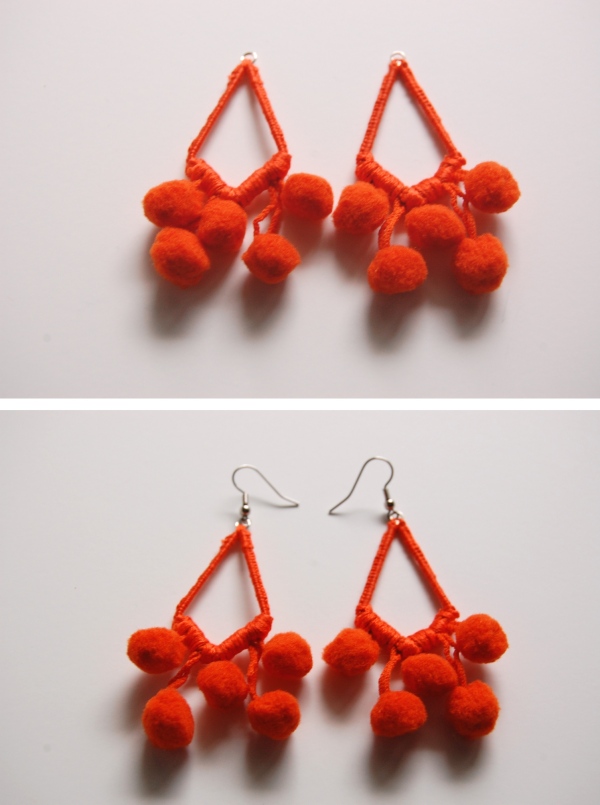
When I was looking for good examples of rope necklaces for my last tutorial, I came across these earrings from Mara Hoffman’s Spring 2012 collection, and I knew what my next DIY project would be. Not quite as big as the originals, these are still dramatic and fun, and they seem like they’ll be the perfect earrings to wear this spring and summer.


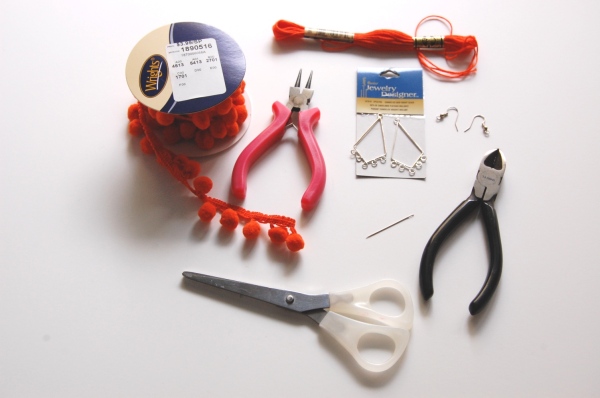
Materials:
Pom-pom trim
Matching embroidery thread
Needle
Chandelier earring form in a diamond shape
Earring hooks
Scissors
Clear nail polish
Pliers
Wire cutters
Methods:
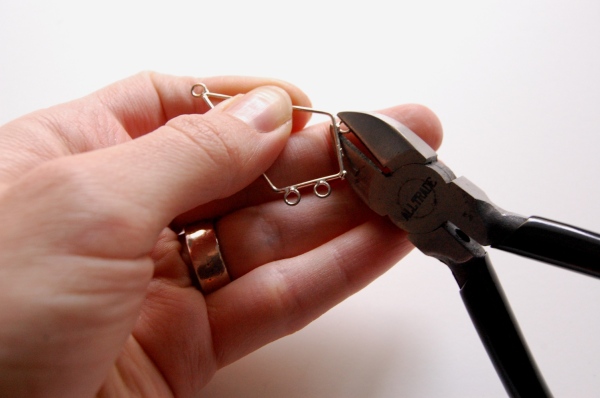
 1. If the earring shapes you are using have loops on them, carefully cut those off. (You should wear eye projection so a stray piece of wire doesn’t hit you in the eye!)
If you can’t find pre-formed diamond shapes, you could bend your own out of thick wire.
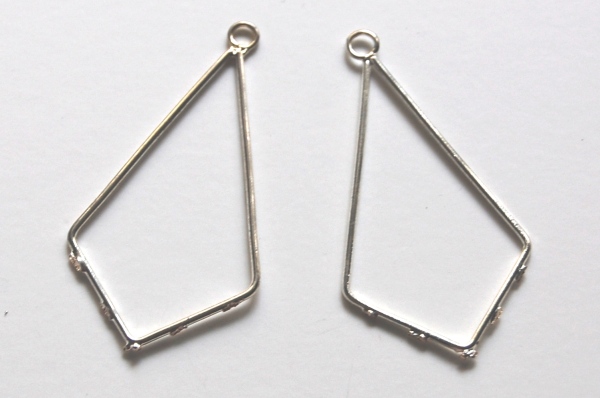
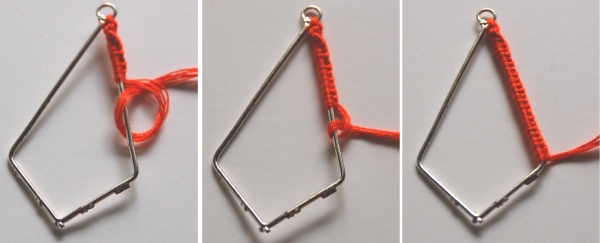
2. Cut a piece of embroidery thread about 16 inches long and tie it through the loop at the top and around one side of the diamond to secure it. Begin knotting the thread around the wire, pulling the knots tight, until you’ve completely covered one side of the diamond. Leave the thread attached.
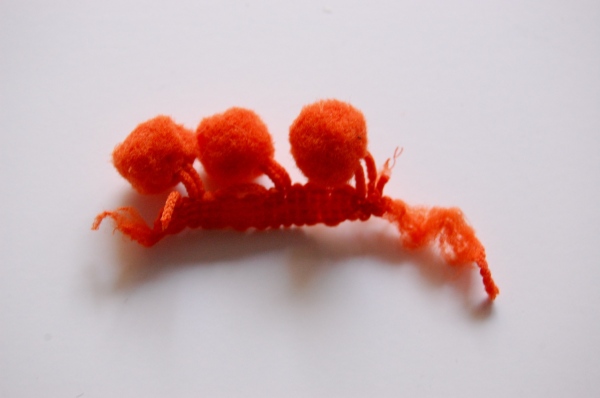
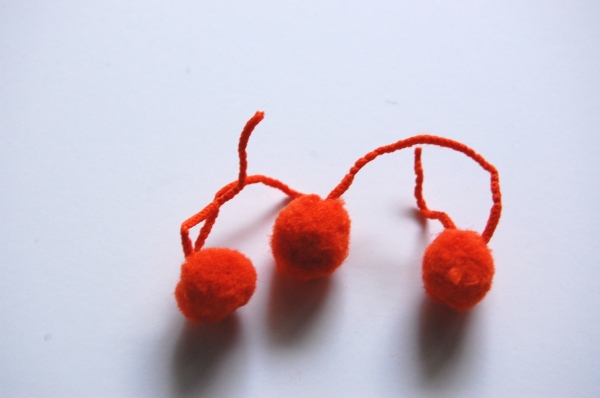
3. Cut a piece of pom-pom trim with three balls. My trim came with a little piece of tape on the end, and as soon as I removed it the trim started to unravel. In this case you want to cut a piece three balls long and unravel it until you have three balls on a string. You might have to do a bit of tugging and snipping, but don’t cut the string the balls are on. Repeat this step so you have two sets of three balls on a string.
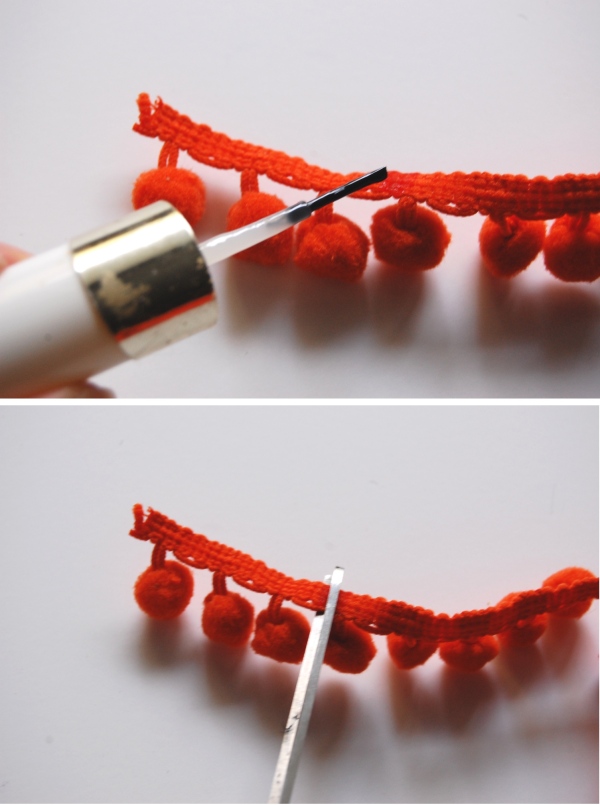
4. For the rest of the pom-pom trim, you don’t want to it to unravel, so coat the cut end in clear nail polish, and coat the region between balls three and four with nail polish and let it dry before cutting a strip of the trim. Repeat so you have two pieces of intact trim with three balls each.
5. Take one of the sets of balls on a string and slide two of the balls around until they hang from two strings about twice as long as the balls attached to the trim. Cut them to that length. Repeat until you have four balls on longer pieces of string.
Thread a needle with embroidery thread and sew those balls to the intact trim.
This is a bit hard to explain in words, but if you check out the pictures below it should be clear.
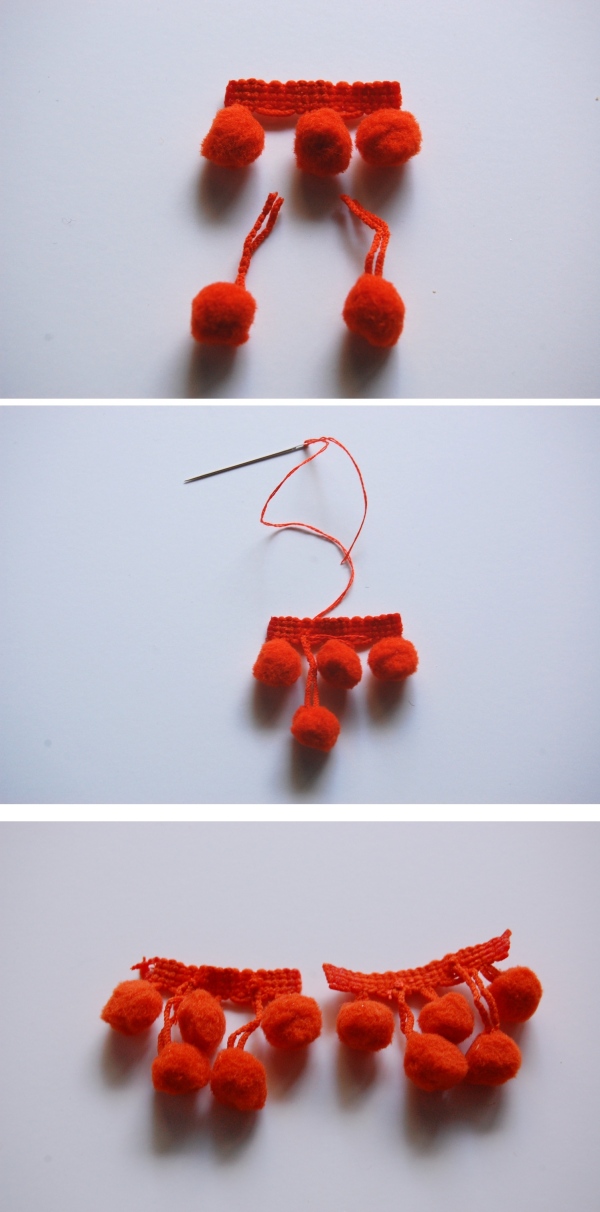
6. Place the earring form centered on top of the trim and sew it to the trim with a few stitches, then wrap the trim around the bottom of the diamond and sew the trim so it encases the bottom point of the diamond. Repeat for both earrings.
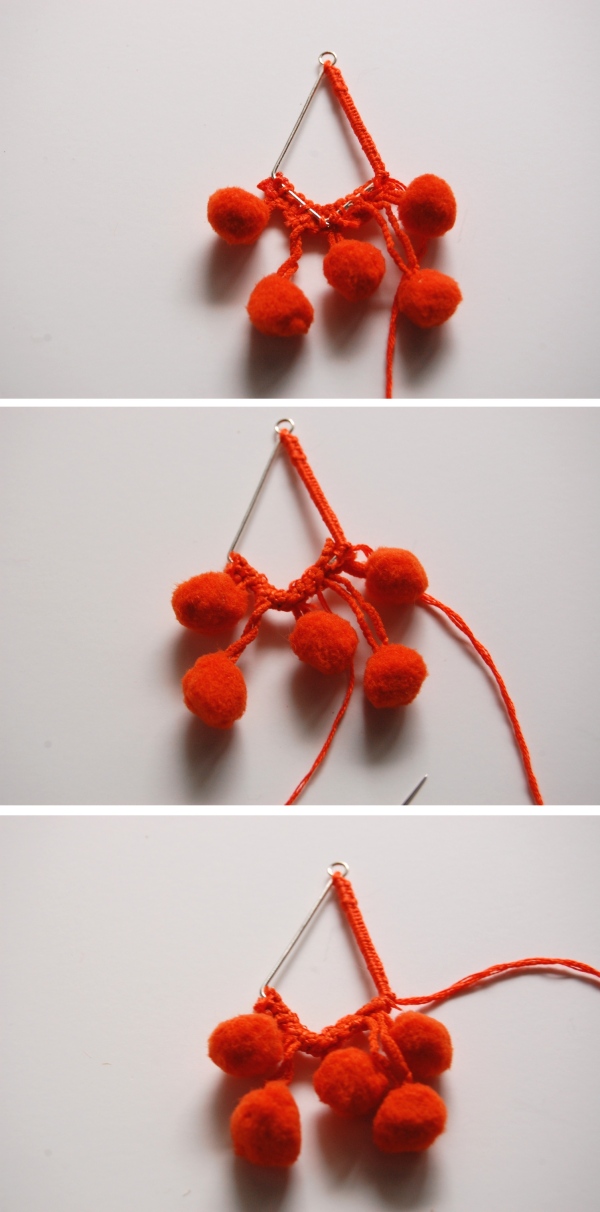
7. Now you’re going to tidy everything up by wrapping it in thread. Take the free thread you left in step 3, and wrap it around the trim you sewed on, leave the pom-poms dangling free. When you get to the end, knot the thread, use a needle to slip the end under the wrapped thread, and cut it.
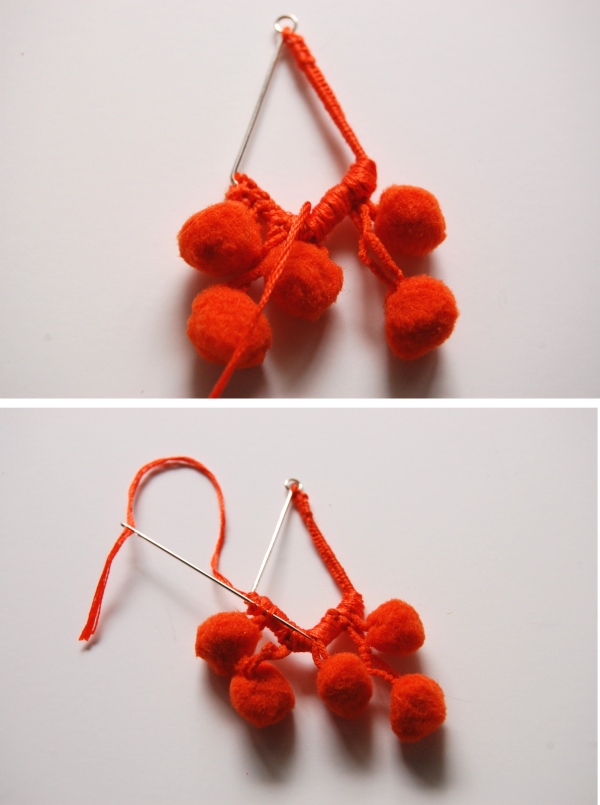
8. Knot around the other side of the earring form, and hide the end of thread like you did in the last step. Repeat for both earrings.
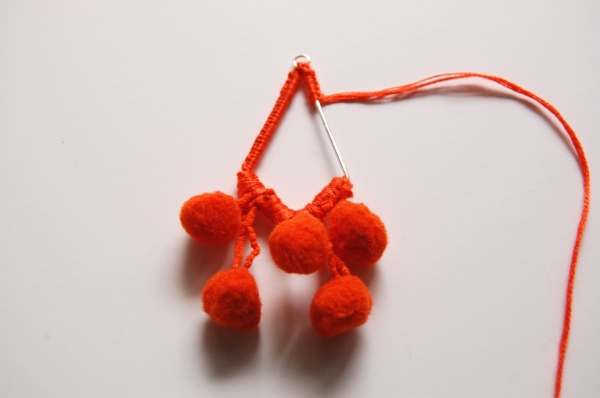
9. Add earring hooks using pliers.

Pi Day

Did you know that Pi(e) Day is coming up on March 14 (3/14)? If you’re not familiar with that very nerdy holiday, it’s the celebration of the mathematical constant, π, or the ratio of a circle’s circumference to its diameter, which comes out to be 3.14 (plus a lot of other numbers). Given the name and the involvement of circles, it seems only appropriate to celebrate the day by eating pie. Oh, what’s what? It’s just an excuse to eat more pie? How could you possibly suggest such a thing!

1. The creator of Pi Day, Larry Shaw 2. Flickr 3. The Pioneer Woman’s tips for perfect pie crusts 4. Martha Stewart’s Lemon Cream Pie 5. Pinterest 6. Irish Car Bomb Pie
Since I don’t want to mess around with a pie crust, and I’m in the mood for something on the lighter side, I think I’m going to make this Lemon Cream Pie to celebrate.
Sunday Street Style
I think my picks this week are all proof that the right accessories can really take a look to another level. Without their cute hats, scarves, sunglasses, and bags, these ladies wouldn’t be nearly so stylish.

Top row: WDUGT Street, Stockholm Streetstyle
Middle row: The Sartorialist, The Locals
Bottom row: Streetstyle Aesthetic, Hel Looks
Outfit Post: Stolen
It’s a time-honored tradition for girls to steal t-shirts from their significant others, though it rarely goes the other way. My husband’s t-shirts are, for the most part, too big and boxy for me to wear. This one, though, is super soft and drapey, and I think I wear it almost as much as he does. Since he’s been gone this week (at the Game Developer’s Conference, in San Francisco), I decided he wouldn’t mind me borrowing it.


T-shirt: AllSaints, men’s department
Jeans: Thrifted
Shoes: Coach, thrifted
Blazer: Gap (old)
Bag: Sewn by me
Bracelets: Gifts
Tutorial: Rope and Wrapped-Thread Necklace
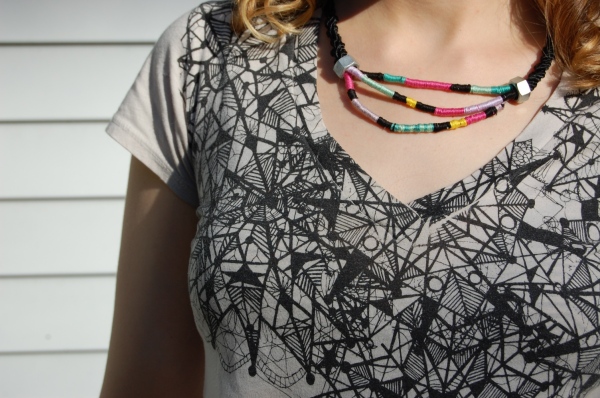
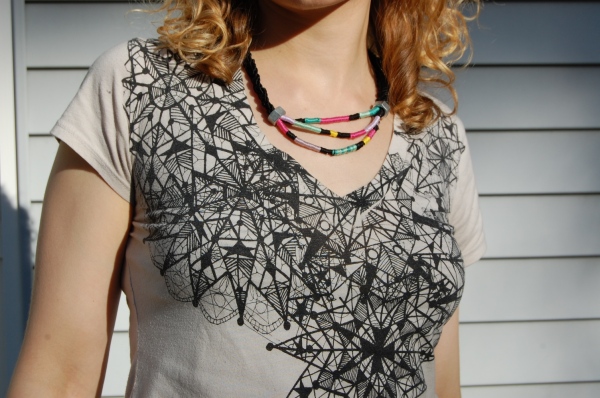
A while ago I made a rope necklace, but this one is quite different and is inspired by a new crop of designer necklaces, which have kind of a techno-tribal feel. Despite the lengthy instructions, these are pretty easy to make yourself, and the best part is that you make them in whatever colors you choose.

Clockwise from top left: Mara Hoffman Spring 2012, Holst + Lee necklace, Philip Lim, Mara Hoffman Spring 2012, Free People, Unknown (Pinterest)
Materials:
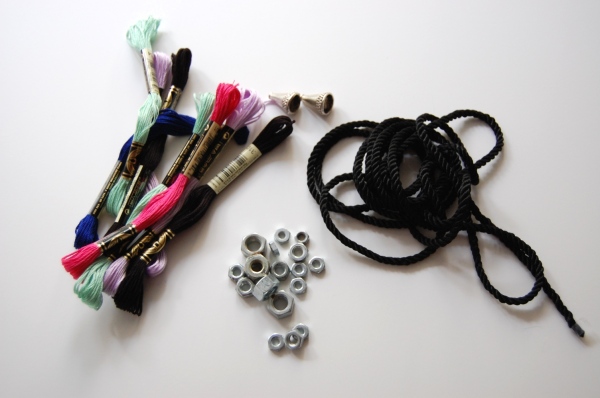
Black rope trim, at least 66 inches
Embroidery thread, assorted colors
Conical endcaps
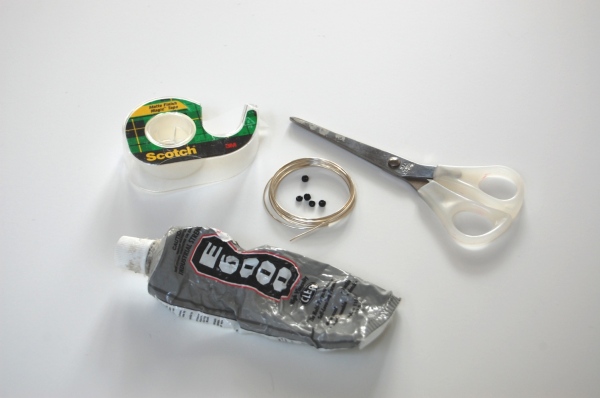
Wire
Beads
Tape
Scissors
Needlenose pliers
Glue
Nuts
Chain
Clasp
Jumprings
Methods:
1. Cut 3 pieces of rope, each 22 inches long. Put a piece of tape on each rope end before you cut it to keep it from unraveling, and tape all three pieces together (I used clear tape but I actually recommend masking tape because it’s easier to remove.)
2. Braid the rope until you have about 5 inches of braid.
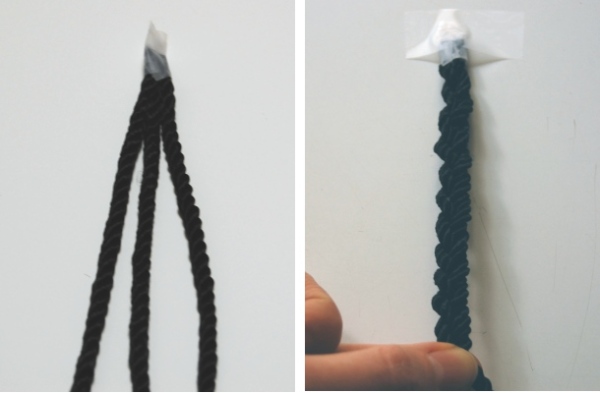
3. Tie a piece of black embroidery thread around the ends of the braid to secure it, then use that thread to begin wrapping the rope.
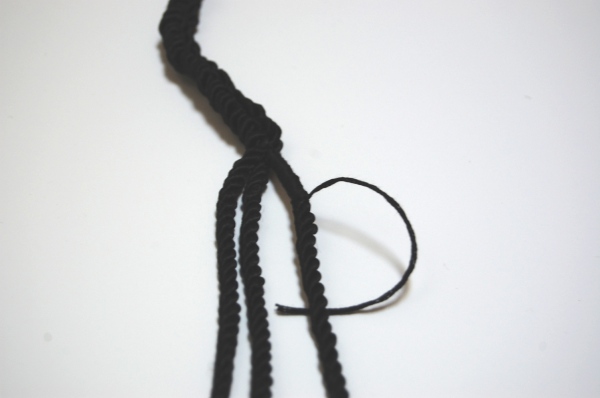
4. When you want to switch colors, tie a piece of the new color to the old one with a square knot and wrap over this knot to hide it.
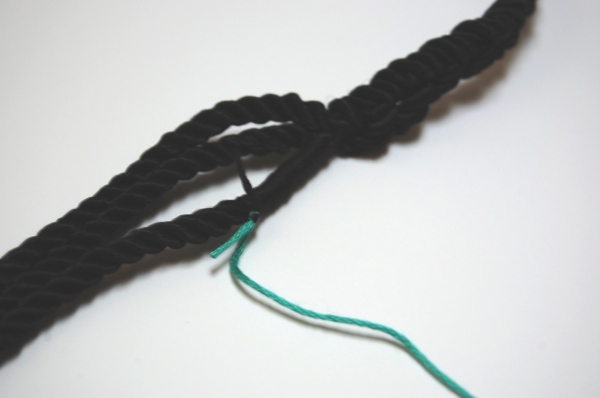
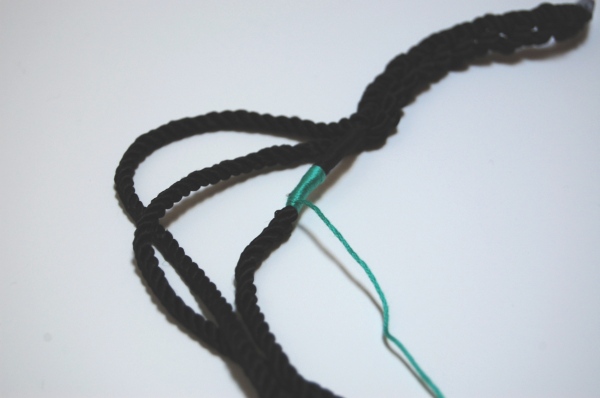
5. Continue wrapping with various colors until the wrapped area reaches 4 inches. Then wrap the middle rope until you have 5 inches of wrapped rope, and the bottom rope until you have 6 inches of wrapped rope.
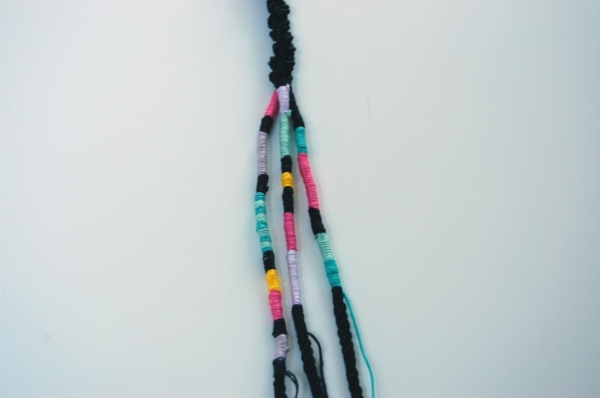
6. After you’ve wrapped segments of all three pieces of rope, fasten the ends of the wrapped areas together with a piece of black embroidery thread.
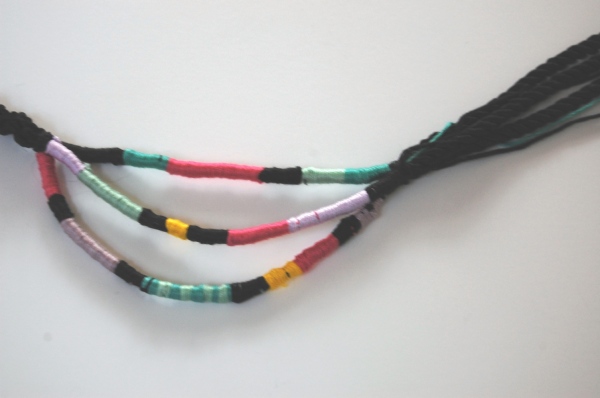
7. At this point you can slip large nuts (or beads) onto the rope to cover the spot where the three ropes converge.
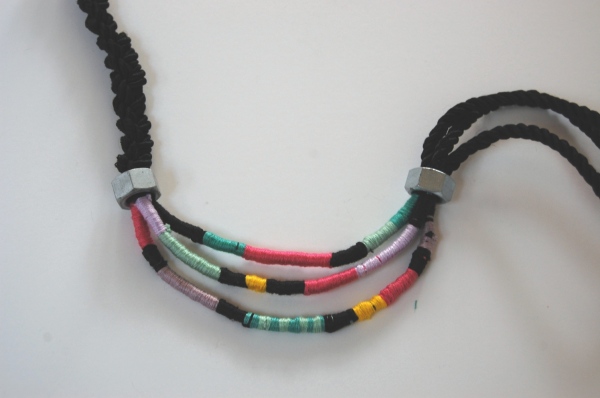
8. Braid the three loose ends together until they’re the same length as the other braid, about 5 inches. Tape them together and cut the rope.
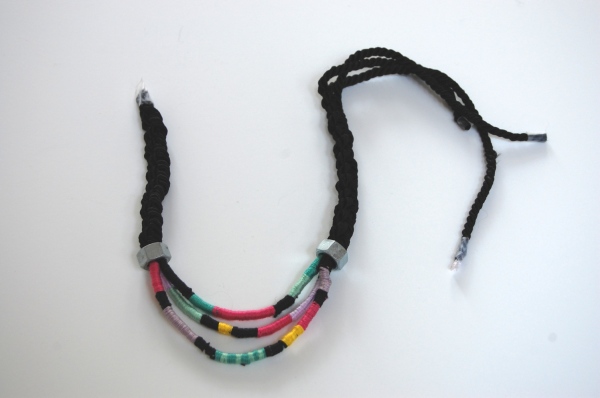
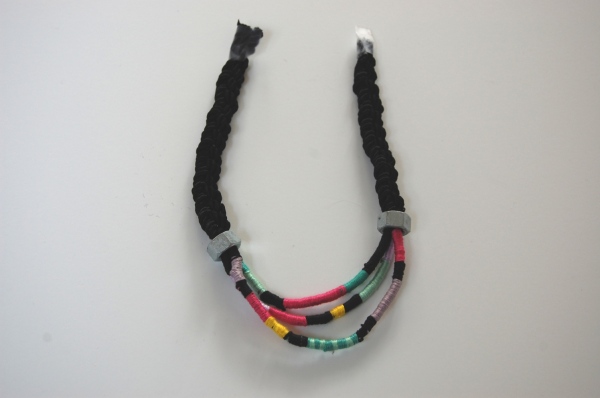
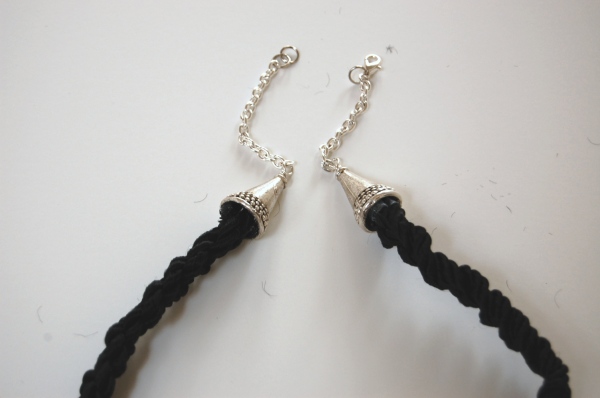
9. Now you’re going to make your endcaps. Take a piece of wire about 1.5 inches long and use the needlenose pliers to make a little twist on one end. Slip a bead on that won’t fit through the small endcap hole, and stick the wire through the end. Then create a loop and attach 2 inches of chain to this loop. Repeat for a second endcap.
10. Using jumprings, attach a clasp to the end of the chain on one endcap, and attach a few jumprings onto the end of the chain of the other end.
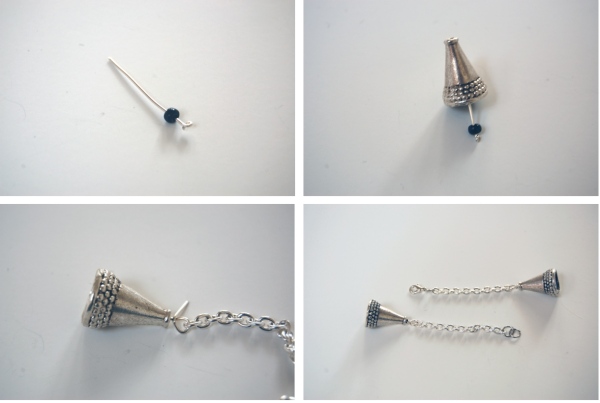
11. Fill your endcaps with glue (I like E6000), and stuff in the rope ends. Let dry.
